Now, in the series about How to install and use OpenCV, the last but not least: Android! (Feel free to check Windows and Linux tutorials).
Table Of Content
Getting Started
- Download and extract the latest Android OpenCV from here.
- Update your Android Studio.
- Install OpenCV Manager from Google Play in your test device (virtual or real).
Steps
- Create a new project.
- Configure as you like, it’s not that relevant here. For testing purposes, I will leave everything set as default.
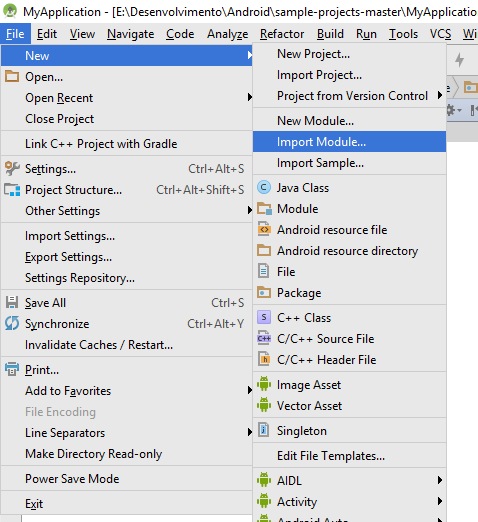
- Import OpenCV to Android Studio, From File -> New -> Import Module.
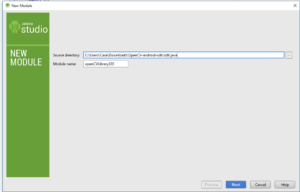
- Choose \OpenCV-android-sdk\sdk\java
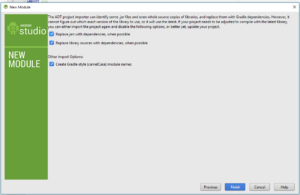
- Leave the default options and then, click Finish.
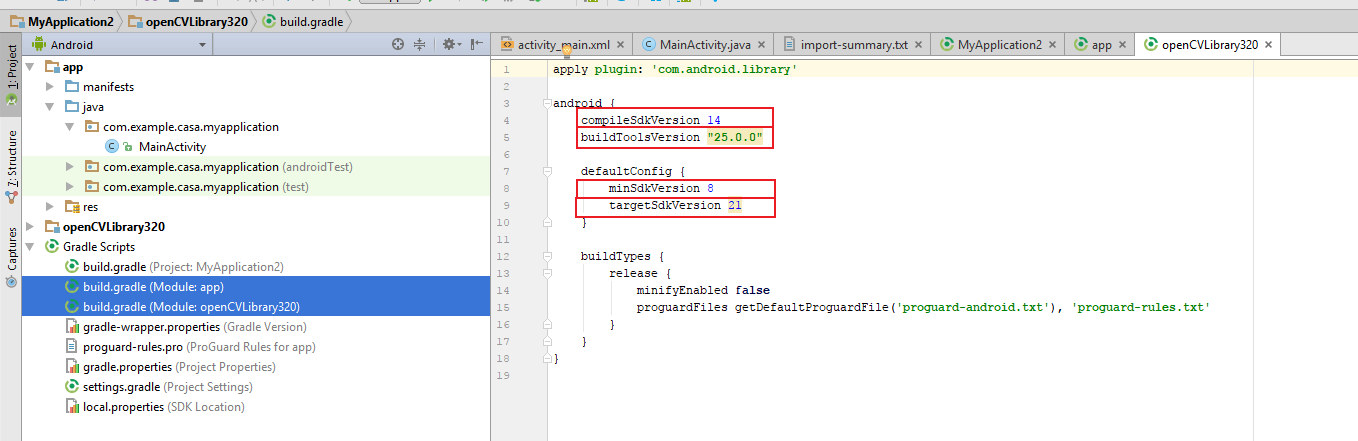
- Update
- a) compileSdkVersion
- b) buildToolsVersion
- c) minSdkVersion
- d) targetSdkVersionof OpenCV’s build.gradle file to match the project build.gradle
- In other words: build.gradle(Module: OpenCV Library) must have the same values from a), b), c) and d) as build.gradle (module: app)
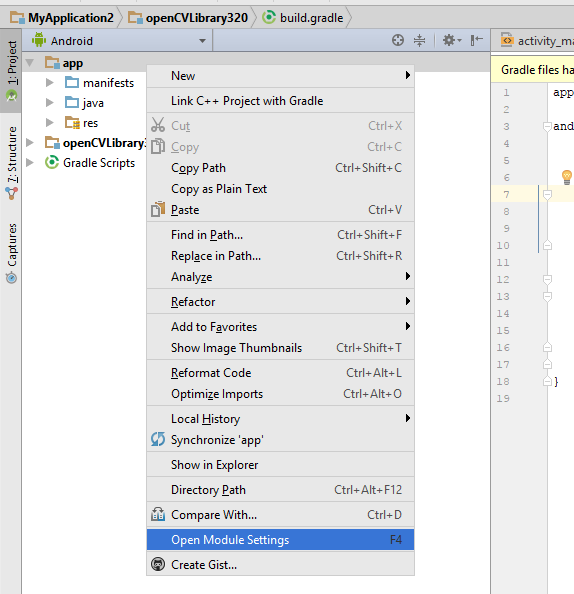
- Add the module dependency by right-clicking on App, then Open Module Settings.
- Click app” then choose the Dependencies tab followed by the + icon and choose Module Dependency.
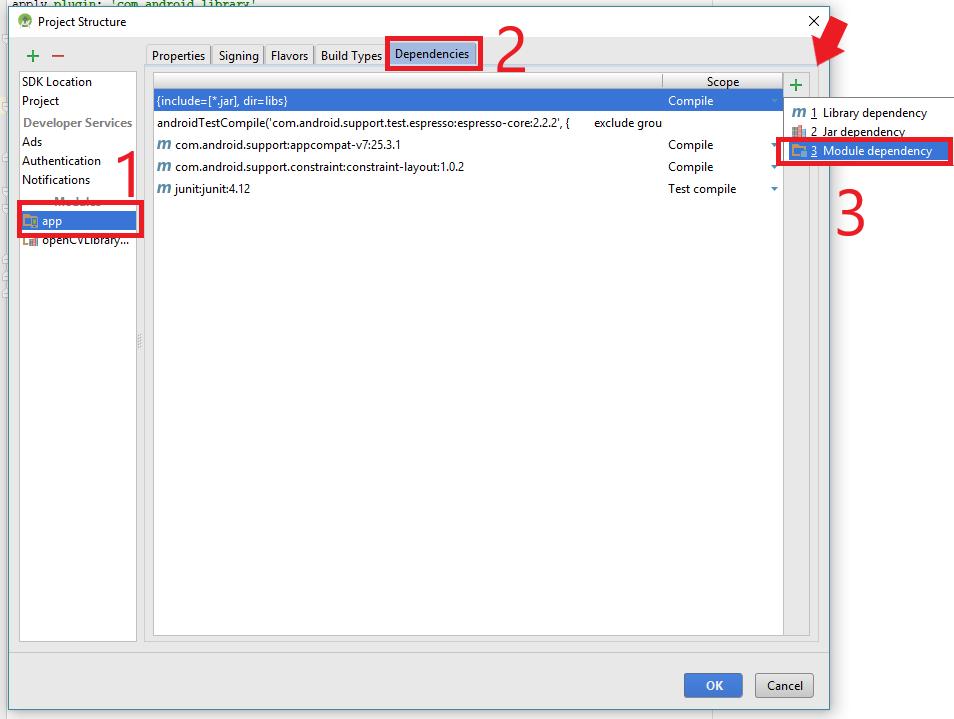
- Select the imported OpenCV module.
- The configuration is over. Now it’s time to add some code to make sure everything is Ok.
Testing some Android code
- Add the code below (and do the required corrections) in your MainActivity to run a simple test.
1 2 3 4 5 6 7 8 9 10 11 12 13 14 15 16 17 18 19 20 21 22 23 24 25 26 27 28 29 30 31 32 33 34 35 | package com.example.casa.myapplication; import android.support.v7.app.AppCompatActivity; import android.os.Bundle; import android.util.Log; import org.opencv.android.BaseLoaderCallback; import org.opencv.android.OpenCVLoader; public class MainActivity extends AppCompatActivity { private static final String TAG = "MainActivity"; BaseLoaderCallback mCallBack = new BaseLoaderCallback(this) { @Override public void onManagerConnected(int status) { switch (status){ case BaseLoaderCallback.SUCCESS: { Log.i(TAG, "OpenCV loaded successfully"); break; } default: { super.onManagerConnected(status); break; } } } }; @Override protected void onCreate(Bundle savedInstanceState) { super.onCreate(savedInstanceState); setContentView(R.layout.activity_main); OpenCVLoader.initAsync(OpenCVLoader.OPENCV_VERSION_3_2_0,this,mCallBack); // Start OpenCV } } |
- This code will plot “OpenCV loaded successfully” and a bunch of status messages about the library if OpenCV initializes correctly.

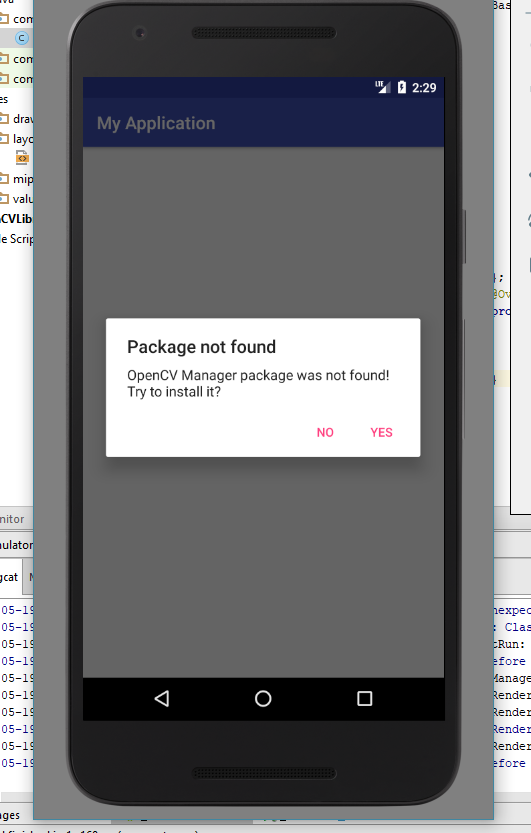
- In case you did not install OpenCV Manager from Google Play this Warning will pop up when the APP starts. If that’s the case, just install.
- The code and configuration files can be found here
Have fun with your projects!
If this post helped you, please consider buying me a coffee 🙂


No Comment! Be the first one.