Time to learn how to build and install OpenCV 4 on Windows!
Table Of Content
This post presents how to build and install the OpenCV 4 library on a Windows system in a simplified and easy way.
Getting Started
To follow this tutorial make sure to download:
Pre-configuration
This step is to ensure MinGW64 and CMake are correctly installed. The misconfiguration of them was a recurring problem in the past posts I wrote about how to install OpenCV 3.
MinGW64
- Extract your MinGW64 to your disk in a place such as C:\mingw64;
- Now add it to System Path;
- Edit your System Environment variables (you can search for Environment in Windows’ Start Menu);
- Click on Path, and Edit;
- Hit New, and add the address of your MinGW64 bin folder.

CMake
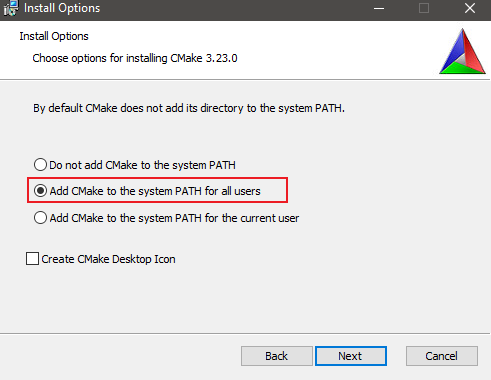
- Install it normally, just paying attention to the option to add CMake to the system path as shown in Figure 2.
OpenCV 4
- Extract the files;
- Create a folder where the OpenCV will be built, I suggest using C:\opencv4 to better follow this tutorial.
To the action!
- Open CMake-GUI;
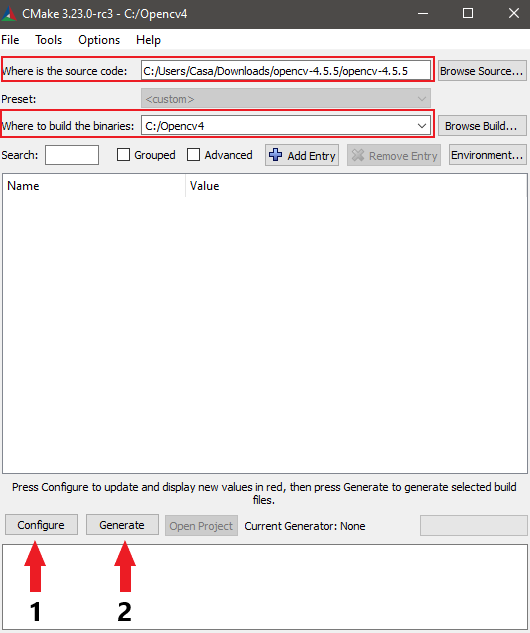
- Set “Where is the source code:” to the folder you just extracted the newly downloaded OpenCV 4 files;
- Set “Where to build the binaries” to the folder you created (I suggested c:\opencv4) ;
- Click Configure;
- Choose MinGW MakeFiles on the next window

- Finish by clicking on Generate when the Configure step finishes;
To summarize what I just described, take a look at Figure 4. It shows what your CMake window should look like and which button to click.
Building and installing OpenCV 4
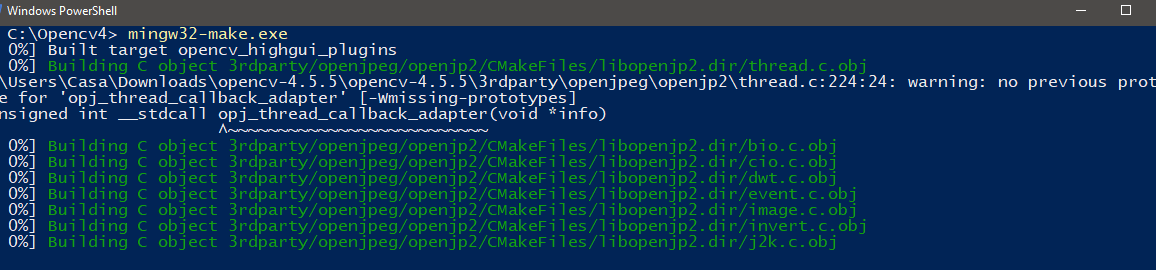
- Now, open the CMD or PowerShell, and navigate to C:\opencv4
- Inside C:\opencv4 type mingw32-make and hit enter to start the build process
- This step probably will take a while, wait until it’s finished.
- Install by running the mingw32-make install command on the same folder;
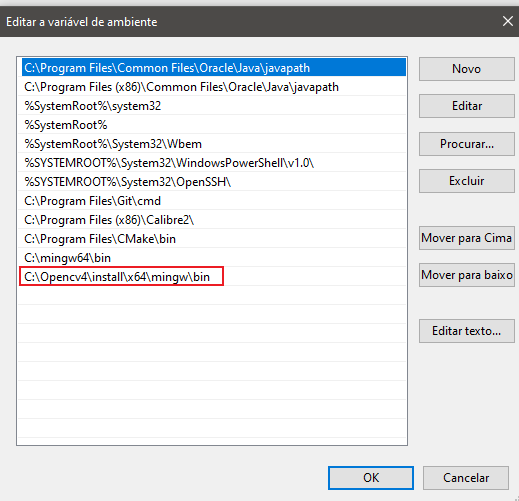
- Finally, add C:\Opencv4\install\x64\mingw\bin to your system path.
Post-installation
Tough but easy, right? Now it is time to test your build/installation.
- Type the command opencv_version on your CMD/Powershell, it must print the current version as shown in Figure 7:


Figure 7 – Output of the opencv_version command
- Type the command opencv_version on your CMD/Powershell, it must print the current version as shown in Figure 7:
- For an even more detailed insight about your build, there’s also the opencv_version_win32 command.
If the info is printed on the CMD/Powershell with no errors, your OpenCV 4 build/install procedure is now complete!
Now that you have everything set up, is possible to use OpenCV to code. Just remember, you must configure your IDE properly by adding to the include paths C:\Opencv4\install\include and C:\Opencv4\install\x64\mingw\lib.
Have fun with your projects!
If this post helped you, please consider buying me a coffee 🙂


No Comment! Be the first one.