Finished training that sweet Pytorch model? Let’s learn how to load it on OpenCV!
Let’s start!
Following the article I wrote previously: “How to load Tensorflow models with OpenCV” now it’s time to approach another widely used ML Library. But first I’d like to make something clear here before we start: Pytorch is not Torch and for now, OpenCV does not support a direct load and use of Pytorch Models.
But, there’s a way: a conversion to the ONNX format (which OpenCV supports). Have you ever heard of it?
ONNX is an open format built to represent machine learning models. ONNX defines a common set of operators and a common file format to enable AI developers to use models with a variety of frameworks, tools, runtimes, and compilers.
Basically, you can convert any model of any library that obeys the ONNX file standards.
Code time!
I’ll separate the code in two (the complete implementation is at the end). The first part is related to model conversion. For simplification purposes, I’ll use a pre-trained one (Densenet 121). Please make sure to set the
onnx_model_path
variable.
1 2 3 4 5 6 7 8 9 10 11 12 13 14 15 16 17 18 | import torch import torch.onnx import torchvision import torchvision.models as models import sys onnx_model_path = "" # https://pytorch.org/hub/pytorch_vision_densenet/ model = torch.hub.load('pytorch/vision:v0.6.0', 'densenet121', pretrained=True) # set the model to inference mode model.eval() # Create some sample input in the shape this model expects # This is needed because the convertion forward pass the network once dummy_input = torch.randn(1, 3, 224, 224) torch.onnx.export(model, dummy_input, onnx_model_path, verbose=True) |
Now we have our model converted and saved as set on the onnx_model_path
variable. Time to test our converted model by loading it with OpenCV:
1 2 3 4 5 6 7 8 9 10 11 12 13 14 15 16 17 18 19 20 21 22 | import cv2 import numpy as np onnx_model_path = "" sample_image = "" #The Magic: net = cv2.dnn.readNetFromONNX(onnx_model_path) image = cv2.imread(sample_image) blob = cv2.dnn.blobFromImage(image, 1.0 / 255, (224, 224),(0, 0, 0), swapRB=True, crop=False) net.setInput(blob) preds = net.forward() biggest_pred_index = np.array(preds)[0].argmax() print ("Predicted class:",biggest_pred_index) import requests LABELS_URL = 'https://s3.amazonaws.com/outcome-blog/imagenet/labels.json' labels = {int(key):value for (key, value) in requests.get(LABELS_URL).json().items()} print("The class",biggest_pred_index, "correspond to", labels[biggest_pred_index]) |
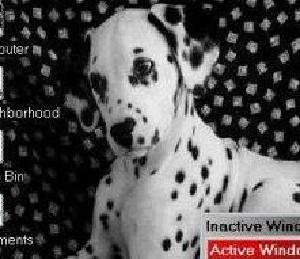
I’ll use Figure 1 to test the output:

Figure 1 – Input image
The following output is generated:
Figure 2 – Output of the script
Working, and predicting precisely our Dalmatian dog! As promised, the complete code with some small additions is available below, (and at my Github).
1 2 3 4 5 6 7 8 9 10 11 12 13 14 15 16 17 18 19 20 21 22 23 24 25 26 27 28 29 30 31 32 33 34 35 36 37 38 39 40 41 42 43 44 45 46 47 | import torch import torch.onnx import torchvision import torchvision.models as models import sys onnx_model_path = "" sample_image = "" if len(sys.argv) == 3: onnx_model_path = sys.argv[1] sample_image = sys.argv[2] else: print ("Please provide 2 arguments: onnxFileName sampleImagePath") sys.exit() # https://pytorch.org/hub/pytorch_vision_densenet/ model = torch.hub.load('pytorch/vision:v0.6.0', 'densenet121', pretrained=True) # set the model to inference mode model.eval() # Create some sample input in the shape this model expects # This is needed because the convertion forward pass the network once dummy_input = torch.randn(1, 3, 224, 224) torch.onnx.export(model, dummy_input, onnx_model_path, verbose=True) import cv2 import numpy as np net = cv2.dnn.readNetFromONNX(onnx_model_path) image = cv2.imread(sample_image) blob = cv2.dnn.blobFromImage(image, 1.0 / 255, (224, 224),(0, 0, 0), swapRB=True, crop=False) net.setInput(blob) preds = net.forward() biggest_pred_index = np.array(preds)[0].argmax() print ("Predicted class:",biggest_pred_index) import requests LABELS_URL = 'https://s3.amazonaws.com/outcome-blog/imagenet/labels.json' labels = {int(key):value for (key, value) in requests.get(LABELS_URL).json().items()} print("The class",biggest_pred_index, "corresponds to", labels[biggest_pred_index]) |
Sidenote: The latest OpenCV’s and Pytorch versions are 4.4 and 1.6 respectively, and there are some operations that the ONNX module still does not support, but that could change in the future. Learn more here.
Have fun with your projects!
If this post helped you, please consider buying me a coffee 🙂

Hi,
Thank you for sharing the code example.
When trying to run this code to export the torch model as onnx, below line:
torch.onnx.export(model, dummy_input, onnx_model_path, verbose=True)
I am getting the error.
module ‘torch._C’ has no attribute ‘_jit_pass_onnx_preprocess’
Can you please let me now the openCV and Torch version you are used ?
Thanks
Hi.
OpenCV 4.4.0
PyTorch 1.6.0
Thanks for this! I came across several tutorials for getting OpenCV to read ONNX for image classification. This is the best!
If one wants the confidence levels:
confidence = preds[0][biggest_pred_index]
You can then display it with:
print(“The class”,biggest_pred_index, “correspond to”, labels[biggest_pred_index], “with a confidence: {:.2f}”.format(confidence.item()))
Regards,
Cecil
Hi Cecil, I’m glad it helped.
Best,
Jean.