OpenCV 5 just came out, and it is a big enough jump from the 4.x line that the prebuilt packages will not always cover what you need, especially if you want a build compiled with MinGW instead of MSVC. Because the toolchain is still settling, you will run into at least one undocumented build issue along the way, but nothing that cannot be solved with a couple of CMake flags. This guide walks through compiling and installing OpenCV 5.0.0 on Windows step by step, using CMake and a MinGW-w64 toolchain from WinLibs, including the workaround for a real build error you will hit with the DNN module.
Table Of Content
What you need
Before starting, grab these four things:
- OpenCV 5.0.0 source, from github.com/opencv/opencv
- opencv_contrib 5.0.0 source, from github.com/opencv/opencv_contrib, only needed if you want the extra modules
- CMake 4.x, the Windows x64 installer from cmake.org/download
- A MinGW-w64 toolchain, downloaded directly from this WinLibs build
Extract OpenCV into a working folder, for example c:\opencv5\opencv-5.0.0, and extract opencv_contrib next to it if you downloaded it.
Install CMake and MinGW
Run the CMake installer and let it add CMake to your PATH. Then extract the WinLibs zip you downloaded earlier to c:\.
Now you need to add the MinGW bin folder to your system PATH so Windows can find gcc, g++ and mingw32-make from any terminal. Open the Start menu and search for Edit the system environment variables, then click it. In the window that opens, click the Environment Variables button. Under either the user variables or the system variables section, select the entry named Path and click Edit. Click New and paste in the following path, as shown in Figure 1:
1 | c:\winlibs-x86_64-posix-seh-gcc-16.1.0-mingw-w64msvcrt-14.0.0-r3\mingw64\bin |

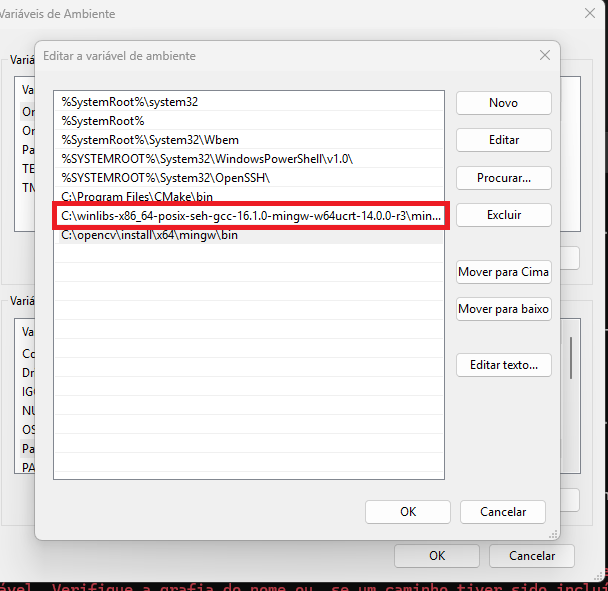
Click OK on every open dialog to save the change. Open a fresh Command Prompt and run gcc --version to confirm it is picked up, existing terminal windows will not see the update. If you see a version number printed back, both tools are ready and you can move on to CMake.
Configure the build in CMake GUI
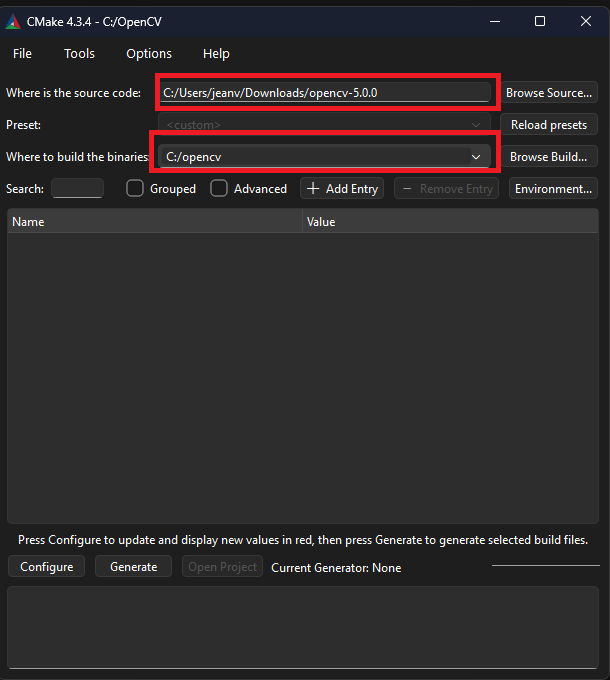
Open cmake-gui and set the source folder to c:\opencv5\opencv-5.0.0, as in Figure 2.

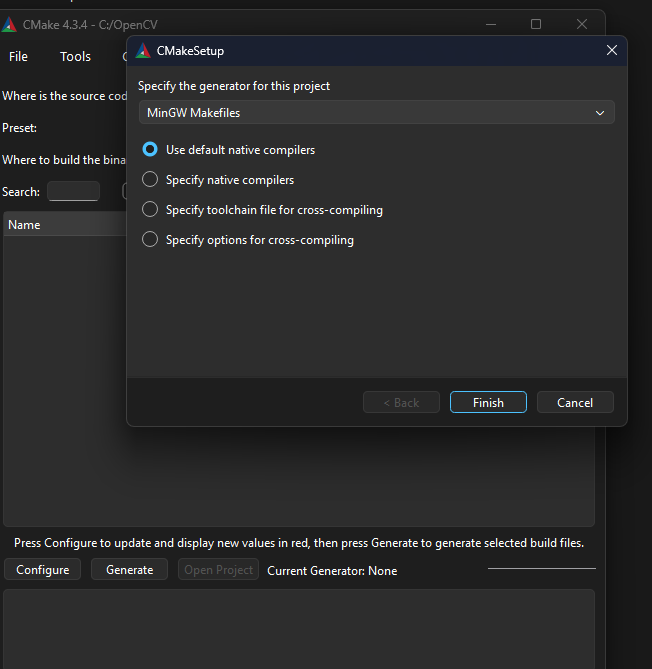
Click Configure, choose MinGW Makefiles as the generator, and keep the default compilers option, as shown in Figure 3. Let the first scan finish, it can take a minute or two the first time.

If you downloaded opencv_contrib and want those modules included, search for OPENCV_EXTRA_MODULES_PATH and point it to:
1 | c:\opencv5\opencv_contrib-5.0.0\modules |
Contrib holds modules that are not part of the core repository, usually newer, experimental, or dependent on extra third party libraries. If you left it out, just continue to the next step.
The DNN build error
If you try to compile the DNN module with MinGW, the build will fail. The reason is a set of new additions made to OpenCV’s DNN module in version 5, specifically a library called MLAS that was brought in for CPU acceleration. MLAS depends on a POSIX function that does not exist on Windows and has no MinGW fallback yet. This is a known limitation tied to those new additions, not something you did wrong, and right now the only workaround is to disable a few flags before building.
In the CMake GUI search box, find and uncheck the following:
BUILD_opencv_dnnBUILD_TESTSBUILD_PERF_TESTS
Then click Configure, and once that finishes, click Generate. To be clear, you will not compile the dnn module, you will compile OpenCV without the dnn module. Everything else, image processing, calibration, video, features, and the contrib modules if you included them, compiles and works exactly as expected.
Build and install
Open a terminal, navigate to the build folder, and start the build:
1 2 | cd c:\opencv5\build mingw32-make |
This takes a while, anywhere from twenty minutes to over an hour depending on your CPU. You can speed it up by adding -j followed by a number of cores, for example mingw32-make -j8, which compiles several files in parallel instead of one at a time. Once it finishes with no errors, install it:
1 | mingw32-make install |
Verify the installation
Add the install bin folder to your PATH as well, the same way you did for MinGW earlier, just point the new entry to this path instead, as shown in Figure 4:
1 | c:\opencv5\install\x64\mingw\bin |


Open a new terminal and run:
1 | opencv_version |

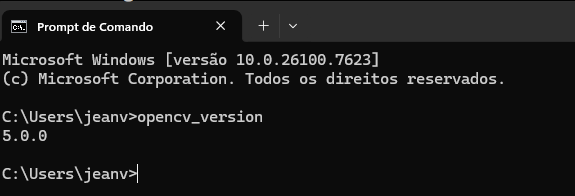
If it prints 5.0.0, as in Figure 5, your OpenCV 5 build is complete and ready to use.
You now have a working OpenCV 5 build compiled by hand with MinGW, with the contrib modules if you chose to include them, and without DNN for the reasons explained above. Link it into your C++ projects the same way you would link any other library, by pointing your compiler at the include and lib folders inside c:\opencv5\install. Keep an eye on the OpenCV GitHub repository for updates, since a proper fix for the DNN module on MinGW would likely be present in future releases.


No Comment! Be the first one.