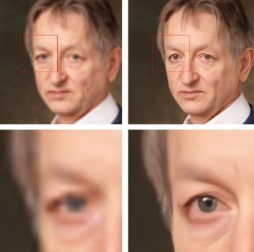
Image Super-Resolution (SR) involves leveraging ML to enhance the resolution of an image.
The objective of the SR models is to upscale the image while preserving its content and details. This process finds utility in diverse applications, including the enhancement of image quality or augmentation of visual details for example.
Suppose you find yourself needing to run a Super-Resolution (SR) model. In that case, the typical procedure involves setting up a repository of a project you found on the internet, downloading specific weights, familiarizing yourself with the inference script, and hoping that your machine executes the algorithm without encountering any performance issues, whether related to memory or inference time.
If simplicity is your preference, OpenCV has you covered. It has support for a set of fairly competent and known models for Super-Resolution within its contrib DNN module.
To install OpenCV and the DNN module, you’ll need to run:
1 2 | pip3 install opencv-python pip3 install opencv-contrib-python |
Available Super-Resolution Models
OpenCV currently supports 4 models. Each one has its purpose and advantages/disadvantages. For running the SR module, you’ll need to choose one and download it. The list below is derived from the one found on the OpenCV GitHub page [5].
- EDSR [1] – Download
- x2, x3, x4 trained models available
- Advantage: Highly accurate
- Disadvantage: Slow and large filesize
- ESPCN [2] – Download
- x2, x3, x4 trained models available
- Advantage: It is tiny and fast, and still performs well.
- Disadvantage: Perform worse visually than newer, more robust models.
- FSRCNN [3] – Download
- Advantage: Fast, small and accurate
- Disadvantage: Not state-of-the-art accuracy
- LapSRN [4] – Download
- x2, x4, x8 trained models available
- Advantage: The model can do multi-scale super-resolution with one forward pass. It can now support 2x, 4x, 8x, and [2x, 4x] and [2x, 4x, 8x] super-resolution.
- Disadvantage: It is slower than ESPCN and FSRCNN, and the accuracy is worse than EDSR.
Code example
After choosing and downloading your model (or models), time to code!
1 2 3 4 5 6 7 8 9 10 11 12 13 14 15 16 17 18 19 20 21 22 | import cv2 import matplotlib.pyplot as plt import time IMAGE_PATH = "images/img1.jpg" # The image you want to upscale MODEL_PATH = "models/EDSR_x4.pb" # Your model path, download it above MODEL_NAME = "edsr" # Can be "espcn", lapsrn", "fsrcnn" or "edsr" SCALE = 4 # The model scale image = cv2.imread(IMAGE_PATH) image = cv2.cvtColor(image, cv2.COLOR_BGR2RGB) sr_model = cv2.dnn_superres.DnnSuperResImpl_create() sr_model.readModel(MODEL_PATH) sr_model.setModel(MODEL_NAME,SCALE) start_time = time.time() upsampled_image = sr_model.upsample(image) end_time = time.time() print(f"Elapsed time: {end_time - start_time}") plt.imshow(upsampled_image) |
Code Walkthrough
- Define constants:
IMAGE_PATH: Path to the input image that you want to upscale.MODEL_PATH: Path to the super-resolution model file you downloaded.MODEL_NAME: Name of the super-resolution model (can be “espcn”, “lapsrn”, “fsrcnn”, or “edsr”). It must be the name of the one you chose to use.SCALE: The scaling factor for upscaling the image (in this case, 4x).
- Load the input image (
IMAGE_PATH) and convert its color representation from BGR to RGB. - Create an SR model, and load the pre-trained model from
MODEL_PATH, and set the model with the specifiedMODEL_NAMEand upscalingSCALE.- The time taken to upscale the image using the super-resolution model by calling
sr_model.upsample(image)is measured and printed
- The time taken to upscale the image using the super-resolution model by calling
- Display the original and upscaled images using Matplotlib.
Testing all models
For this test, the “baseline” image was degraded by reducing its resolution to 1/4 using cv.resize(). Subsequently, it was upscaled back using all available models, and a basic bicubic resize.
Image 1
Image 2
For the images shown above, the EDSR delivers the best results, although it is the slowest option. On the other hand, the ESPCN is the fastest but comes with average quality. Also, it’s worth noting that the PSNR values are higher compared to a basic bicubic resize for all cases.
Conclusion
If you seek a straightforward method to use a Super-Resolution (SR) model, OpenCV provides a user-friendly solution for your needs. OpenCV’s contrib DNN module supports capable models, ensuring a user-friendly experience.
References
[1] Bee Lim, Sanghyun Son, Heewon Kim, Seungjun Nah, and Kyoung Mu Lee, “Enhanced Deep Residual Networks for Single Image Super-Resolution”, 2nd NTIRE: New Trends in Image Restoration and Enhancement workshop and challenge on image super-resolution in conjunction with CVPR 2017. [PDF] [arXiv] [Slide]
[2] Shi, W., Caballero, J., Huszár, F., Totz, J., Aitken, A., Bishop, R., Rueckert, D. and Wang, Z., “Real-Time Single Image and Video Super-Resolution Using an Efficient Sub-Pixel Convolutional Neural Network”, Proceedings of the IEEE conference on computer vision and pattern recognition CVPR 2016. [PDF] [arXiv]
[3] Chao Dong, Chen Change Loy, Xiaoou Tang. “Accelerating the Super-Resolution Convolutional Neural Network”, in Proceedings of European Conference on Computer Vision ECCV 2016. [PDF] [arXiv] [Project Page]
[4] Lai, W. S., Huang, J. B., Ahuja, N., and Yang, M. H., “Deep laplacian pyramid networks for fast and accurate super-resolution”, In Proceedings of the IEEE conference on computer vision and pattern recognition CVPR 2017. [PDF] [arXiv] [Project Page]
[5] Github, Super Resolution using Convolutional Neural Networks https://github.com/opencv/opencv_contrib/tree/master/modules/dnn_superres
Have fun with your projects!
If this post helped you, please consider buying me a coffee 🙂

